Trained to Deny: How LLMs Reject Capabilities They Demonstrably Have
A Case Study in AI Epistemic Distortion

I recently entered the Kannada MNIST Challenge on Kaggle, which is a computer vision problem based on a derivative of the MNIST dataset that is extremely popular in intro to machine learning tutorials.
Kannada is a language spoken predominantly by people of Karnataka in southwestern India. The language has roughly 45 million native speakers and is written using the Kannada script. The dataset is a collection of handwritten digits, like MNIST, with the goal of the competition being to design and train a model that accurately recognizes and classifies them accordingly.
This notebook will be a documentation of the model I made, using TensorFlow and Keras, with some insight into the custom activation function I decided to use in some of the layers called ‘Swish’. I originally ran this in a Kaggle notebook, but will leave a link to the code on my GitHub.
To begin, I imported the standard Python packages numpy and pandas, and then tensorflow and checked that my notebook was connected to the GPU.
import pandas as pd
import numpy as np

import tensorflow as tf
tf.test.gpu_device_name()

After the GPU connection is affirmed, I import the training and test data, extract the features and targets, and print the shapes of each.
train_df = pd.read_csv("../input/Kannada-MNIST/train.csv")
test_df = pd.read_csv("../input/Kannada-MNIST/test.csv")


features = train_df.iloc[:,1:].values
targets = train_df.iloc[:,0].values
validation = test_df.iloc[:,1:].values

print("training images shape {}".format(features.shape))
print("training labels shape {}".format(targets.shape))
print("validation images shape {}".format(validation.shape))

Next, I reshape the images into flattened vectors, and normalize the pixel values between 0 and 1.
# reshape images

reshaped_features = features.reshape(features.shape[0], 28, 28, 1)
reshaped_validation = validation.reshape(validation.shape[0], 28, 28, 1)

print("x_flattened size {}".format(reshaped_features.shape))
print("val_flattened size {}".format(reshaped_validation.shape))

def normalize_data(df):
  df = df / 255.
  return df

normalized_features = normalize_data(reshaped_features)
normalized_validation = normalize_data(reshaped_validation)
 _____
_____
from sklearn.model_selection import train_test_split
import matplotlib.pyplot as plt
# train test split
X_train, X_test, y_train, y_test = train_test_split(normalized_features, targets, test_size=0.2, random_state=7)
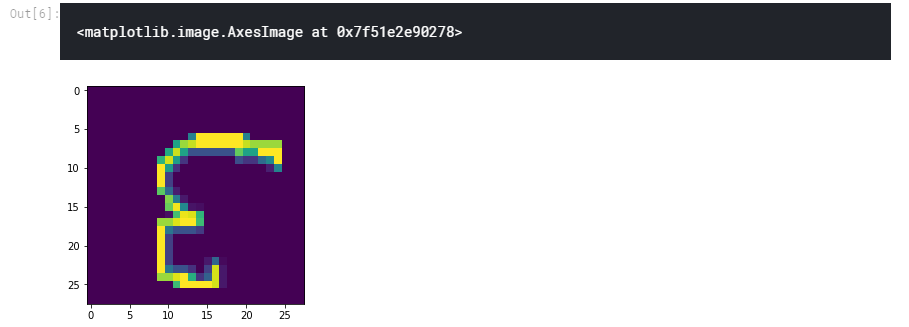
# viz
plt.imshow(X_train[0][:,:,0])
Finally we get to building the model itself! I built a model in TensorFlow using the tf.keras API.
First I set the number of epochs, the batch size, and learning rate to be constants. Next up is defining the Swish activation function, which is f(x) = x * sigmoid(β * x). Swish was found by researchers to work better than ReLU on deeper models after an experiment in which they leveraed automatic search techniques to discover new activation functions. The paper they document this in was a really good read, and I recommend it.
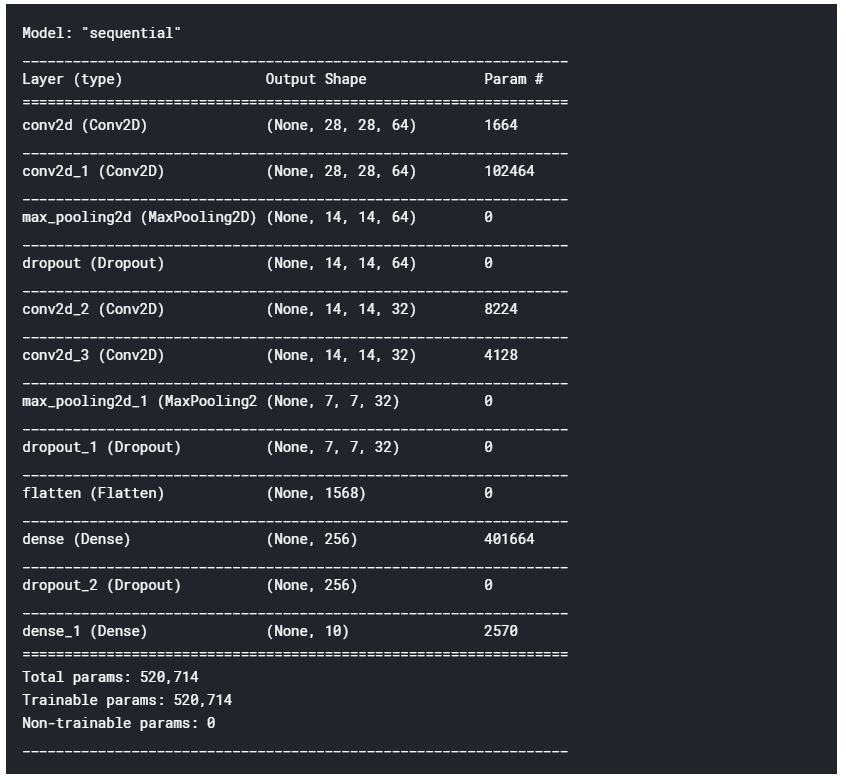
For the model’s architecture, however, I use a combination of Conv2D, MaxPool2D, Dropout, and Flatten layers to construct the model. For an optimizer, I chose Adam with the default parameters from its original paper, and have sparse categorical crossentropy as my loss function, with accuracy as the evaluation metric set by the competition.
# Build CNN with Keras and the addition of Swish!

# Config
EPOCHS = 100
BATCH_SIZE = 32
LEARNING_RATE = 0.001

from tensorflow.keras.models import Sequential
from tensorflow.keras.layers import Dense, Dropout, Flatten, Conv2D, MaxPool2D

# add custom swish activation function
from tensorflow.keras.backend import sigmoid
def swish(x, beta = 1):
    return (x * sigmoid(beta * x))

from tensorflow.keras.layers import Activation
tf.keras.utils.get_custom_objects().update({'swish': Activation(swish)})

# Build model

model = Sequential()

# add layers
model.add(Conv2D(filters=64, kernel_size=(5, 5), padding='Same', activation='relu', input_shape=(28, 28, 1)))
model.add(Conv2D(filters=64, kernel_size=(5, 5), padding='Same', activation='swish', input_shape=(28, 28, 1)))
model.add(MaxPool2D(pool_size=(2,2)))
model.add(Dropout(0.25))

model.add(Conv2D(filters=32, kernel_size=(2, 2), padding='Same', activation='swish'))
model.add(Conv2D(filters=32, kernel_size=(2, 2), padding='Same', activation='swish'))
model.add(MaxPool2D(pool_size=(2, 2), strides=(2, 2)))
model.add(Dropout(0.25))

model.add(Flatten())
model.add(Dense(256, activation='swish'))
model.add(Dropout(0.3))
model.add(Dense(10, activation='softmax'))

## optimizer
keras_optimizer = tf.keras.optimizers.Adam(lr=LEARNING_RATE)

# Compile model
model.compile(optimizer=keras_optimizer, loss='sparse_categorical_crossentropy', metrics=['accuracy'])
model.summary()
A Case Study in AI Epistemic Distortion
Tchebycheff Approach
not financial advice, just a crypto degen thinking out loud
Thoughts I’ve had after reading the news about Apple’s new policies that support “Expanded Protections for Children”.
Using a Convolutional Neural Net to Swish the Kannada MNIST Challenge
Using Anaconda Behind a Firewall or Proxy
Recently I learned of a cool Python package calledpandas_profilingthat serves as an extension of the pandas.DataFrame.describe() function in the pandas modul...
This post is simply a collection of some of my favorite webcomics that my synthetic intelligence, nightfall, created during the last week and a half from Se...
A notebook detailing how to work through the Open AI taxi reinforcement learning problem written in Python 3. Source for environment documentation. import g...